
Let’s be honest—joints are probably the easiest and most convenient way to smoke weed when you’re out and about. You can toss one in your pocket and take it pretty much anywhere. But first, you’ve got to know how to roll one.
Rolling the perfect joint isn’t just a basic skill—it’s kind of an art. If it’s too loose, it’ll fall apart before you even get to light it. Too tight, and you’ll be struggling just to get a decent pull. Finding that sweet spot takes a little patience and practice.
Don’t worry, though. This guide will walk you through the process step by step, so you can roll with confidence—and maybe even a little pride.
What Makes Joints So Popular?
Smoking a joint is just one of those easy, no-fuss ways to enjoy weed when you’re out and about. You can roll a few ahead of time and stash them in a little case that slips right into your jacket pocket or bag. When you’re ready to chill, just pull one out, spark it up, and you’re good to go.
Way simpler than carrying around a bulky pipe or bong—and a lot more discreet, too.
What You’ll Need to Rolling the perfect Joint
First things first—you’ve got to have the right stuff on hand before you can roll a joint. If you’re new to it, start simple: grab about half a gram of weed and a standard 1¼” rolling paper. That size is perfect for beginners—easy to handle and just the right amount of weed to work with.
Sure, there are other options out there. King-sized papers can hold more (up to a gram), and smaller 1” papers are usually meant for tobacco. But the bigger and smaller ones can be a pain to roll if you’re just learning. Stick with the basics at first—it makes life easier.
Most rolling papers are about an inch wide, but the length can vary depending on the brand you’re using.
Besides the paper and weed, you’ll want a few other things to make the process smoother. A crutch (aka filter) for the tip, a grinder to break down your bud, and maybe a pen or something similar to help pack the joint once it’s rolled. Trust me—it helps.
Let’s Talk About the Paper
Rolling the perfect joint is a super convenient way to enjoy cannabis, but it’s good to keep in mind that smoking can still be hard on your lungs. White papers, especially those that might have bleach or other chemicals, can be even worse.
For a better option, go for brown papers made from natural materials like:
- Rice
- Bamboo
- Flax
- Hemp
Hemp papers, in particular, are awesome. They burn evenly and strong, and they won’t mess with the flavor of your weed.
7 Steps to Master the Art of Rolling the perfect Joint
Here are the steps you will need to take how to roll a joint:
Step 1: Remove Seeds and Stems
Before you start rolling, take a moment to remove any seeds and stems. They don’t have much THC and can give you a headache if smoked. Plus, if the stems aren’t ground up well enough, they can tear through the paper, making your joint harder to roll.
Step 2: Grind Your Weed
Make sure to break up your weed before you roll—it helps the joint burn evenly and hit better.
Using a grinder is the easiest way to do this, plus it keeps your hands from getting all sticky. But if you don’t have one, your hands or scissors will work too.
Just a heads-up: dry weed is way easier to grind. If your weed is a bit on the moist side, try hanging it upside down or storing it in a spot that’s around 60-70°F to dry it out. It’ll also help your weed last longer!
Step 3: Make a Crutch
Now, it’s time to make a crutch (or tip/filter). It’s not totally necessary, but it definitely helps keep your joint stable and makes rolling a lot easier.
To make one, grab a small piece of stiff paper—like a business card or even the packaging from your rolling papers. Cut it into a few centimeters thick, fold it, and slide it into one end of the rolling paper before you add your weed.
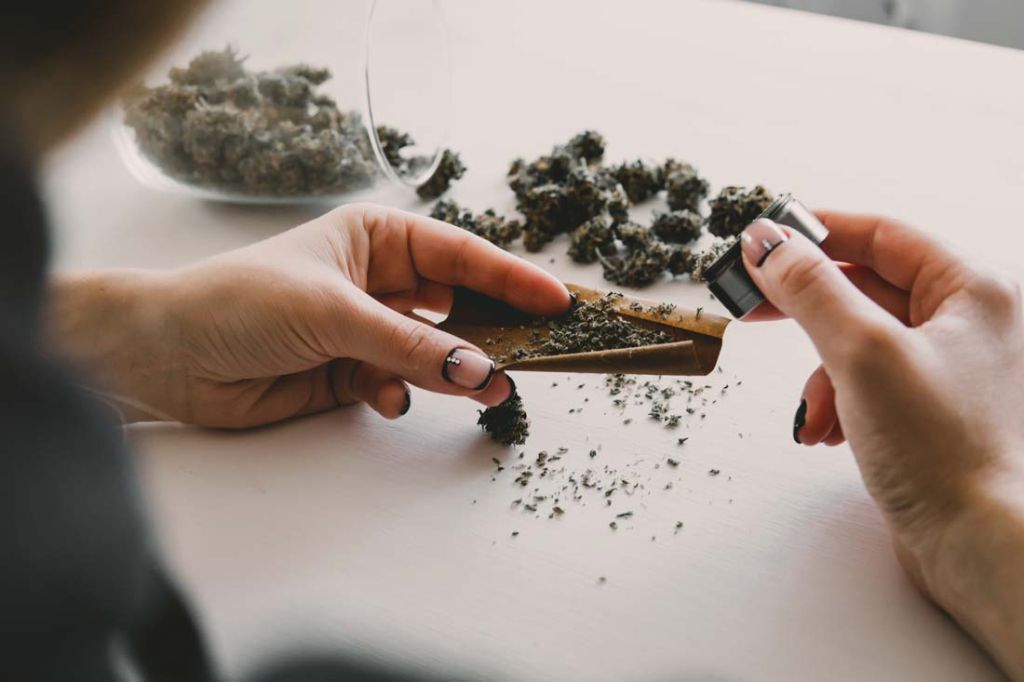
Step 4: Add the Weed
Now, grab your weed and sprinkle about ½ to a gram evenly along the paper. Use your fingers to gently fold the paper, helping the weed spread out nice and even.
Step 5: Roll the Joint
Now, pinch the paper between your fingers and roll it back and forth until it starts shaping into a cone. If you’re a beginner, you might find yourself rolling and re-rolling to get the paper just right, but honestly, just a few rolls should be enough. If you roll it too much, though, it won’t hit right.
Step 6: Seal the Joint
Sealing the joint is probably the most important step, so take your time here.
Start by tucking the unglued side of the paper into the roll. Use your dominant hand to get it going, then follow the seam and tuck the rest of the paper in.
Once it’s all tucked, roll it up and give the edge a light lick to seal it. Just a little moisture—too much and the paper will get soggy.
It helps to start licking from the side with the crutch. That way, the paper rolls around evenly.
After sealing one end, keep working your way down, tucking and sealing as you go.
Step 7: Pack the End
Alright, now you just need to pack the open end to make sure it burns evenly. You can use pretty much anything long and thin, like a pen, the end of a shoelace, or a small stick—just pack it in there gently.
Once it’s packed, twist the tip of the paper to seal everything inside.
And boom, you’re done! Now that you know how to roll a joint, you’re all set for a smooth session. Just don’t hog it, and enjoy your chill time!